Network
Blog
About Us
Connect
Configure Wallet
Add Realio Network to Wallet
Realio Investment Platform
Investment platform
Realio Network App
Native staking app
Configure Wallet
Add Realio Network to Wallet
Realio Investment Platform
Investment platform
Realio Network App
Native staking app

The Realio Network offers the option to be added to the Keplr and the MetaMask wallet interfaces directly from Realio Network's official website.
Adding the Realio Network into these multi-chain wallets will allow users to unlock new possibilities and expand their blockchain ecosystem within a unified interface that simplifies the management of digital assets. It will offer a broader range of decentralized services, enabling users to view account balances, send and receive transactions, interact with smart contracts, and, most importantly, actively participate in Realio Network-specific activities.
Let’s explore each wallet and how to add the Realio Network.
Keplr
Keplr wallet is a powerful and user-friendly solution that simplifies the management of digital assets across multiple blockchain networks. It serves as your passport to the world of decentralized finance (DeFi), enabling seamless interaction with various blockchains and decentralized applications (dApps) from a single, unified interface.
Key Features of the Keplr wallet include:
MetaMask
MetaMask wallet is a groundbreaking, open-source solution that serves as your gateway to the exciting world of Web3. With over 10 million active monthly users, MetaMask has established itself as a trusted and feature-rich wallet, enabling seamless interaction with blockchain networks and decentralized applications (dApps).
Key Features of the MetaMask wallet include:
Automatic Steps to Add Realio Network to Keplr
Manual Steps to Add Realio Network to Keplr
Automatic Steps to Add Realio Network to MetaMask
Manual Steps to Add Realio Network to MetaMask
Step 1: Go to Realio Network
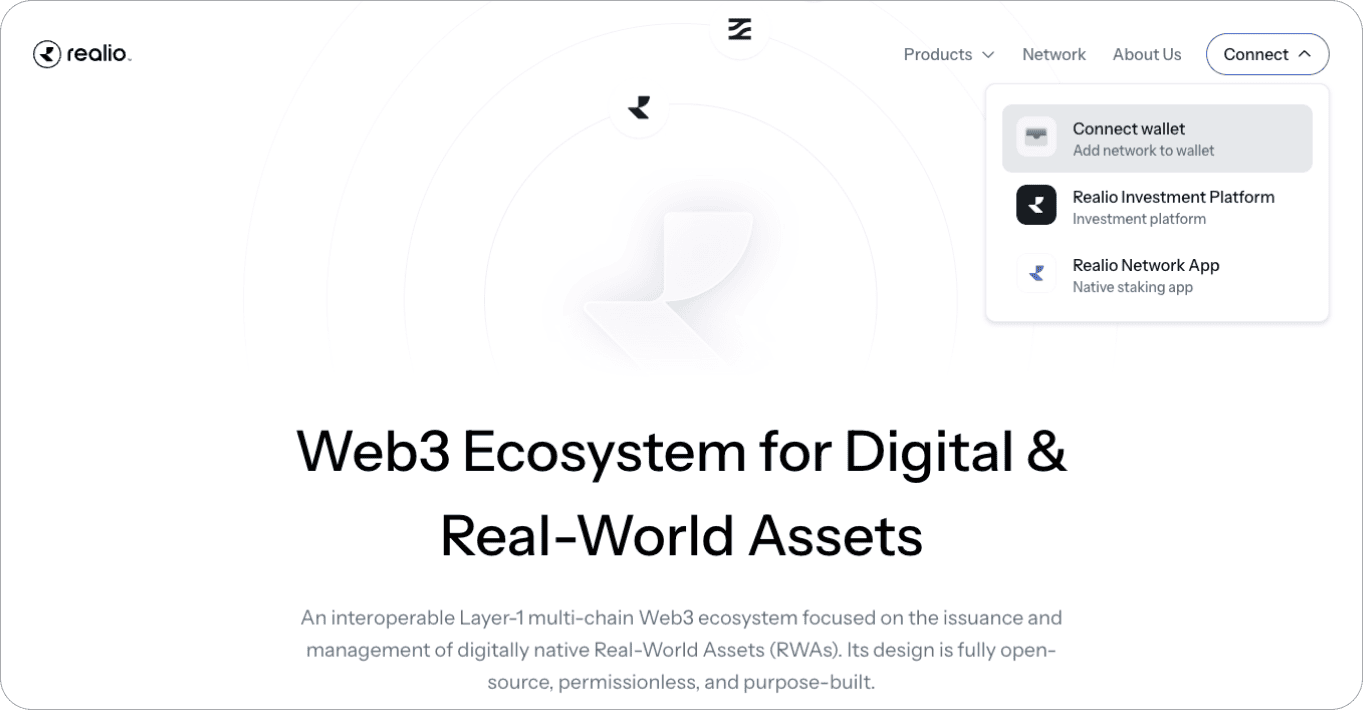
Go to the Realio Network official website.
Step 2: Add Network to Wallet
Open the Network connector by hitting the "Connect" button on the upper right-hand side of your screen, and “Connect Wallet / Add Network to Wallet” on the dropdown menu.
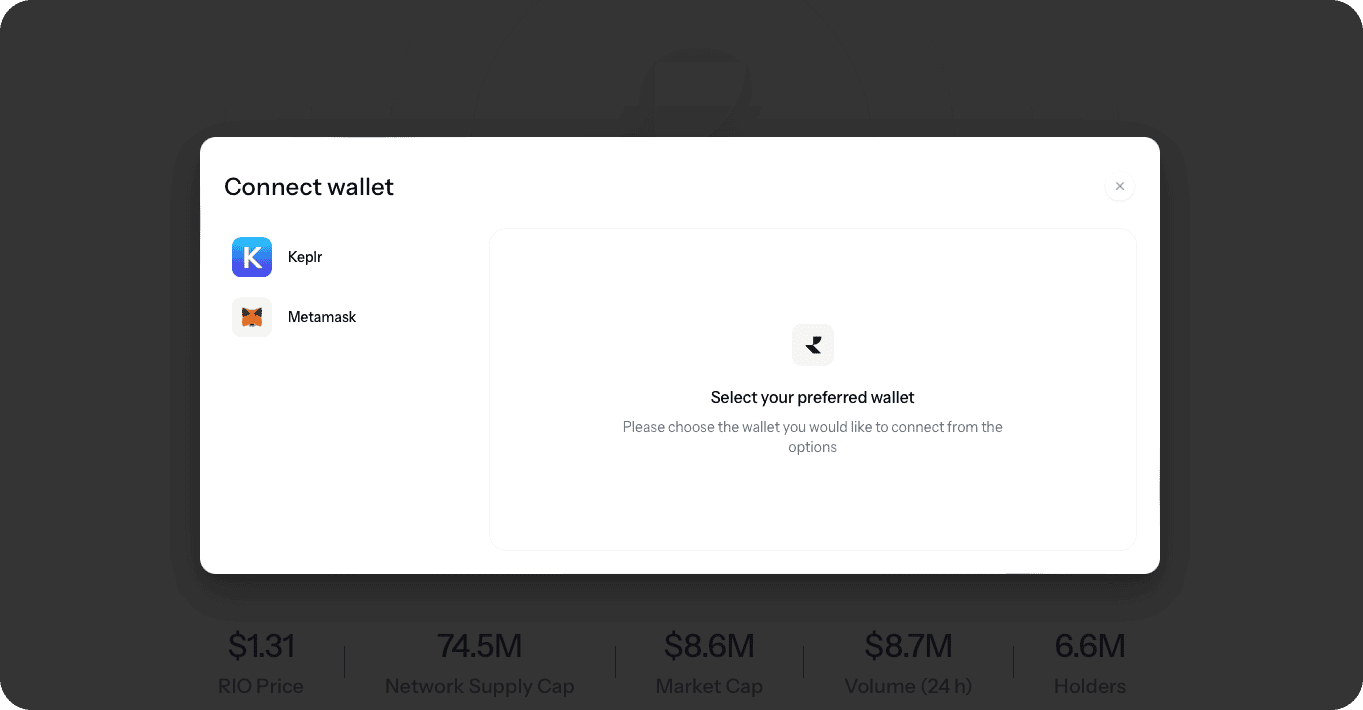
Step 3: Select Keplr
Select the Keplr icon on the modal on the left-hand side.
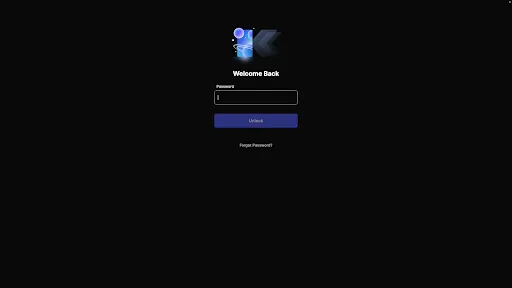
Step 4: Enter Credentials
Enter your Keplr credentials to connect your account.
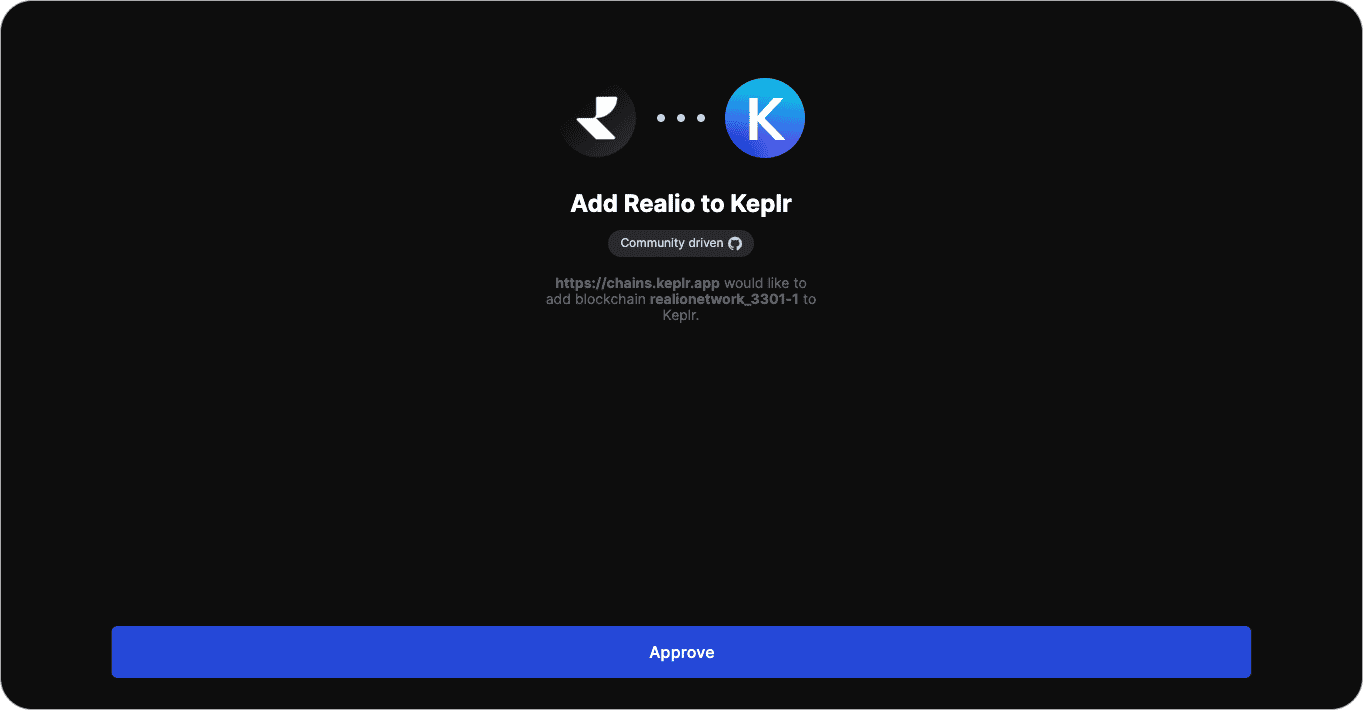
Step 5: Approve Connection
Review the information about the Realio Network, and approve the Network by hitting the “Approve” button on the bottom of your screen.
You can also add the Realio Network to Keplr by selecting it from a list of available networks.
Step 1: Open Keplr Browser Extension or Mobile App
Open the Keplr browser extension by hitting the Keplr icon on the upper right-hand side of your screen or open the mobile app.
After logging into your Keplr account, visit the hamburger menu on the upper left-hand side of your screen.
Step 2: Menu Selection
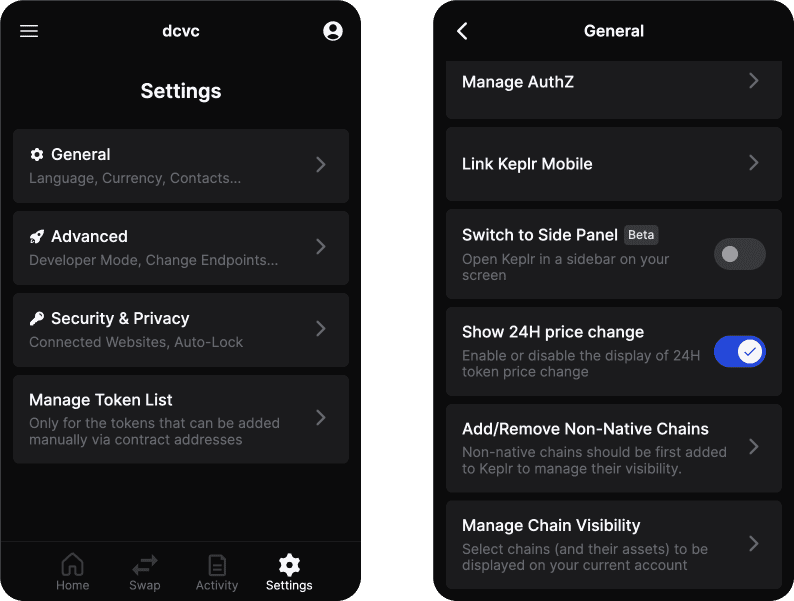
From the drop-down, click “Settings.”
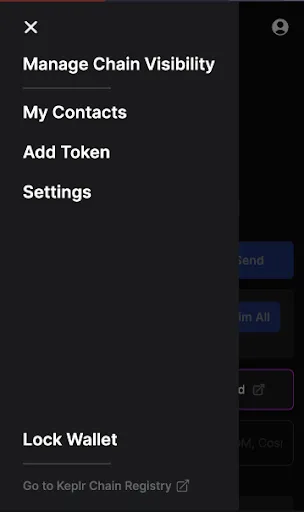
Into the settings section, scroll down and click on "Add/Remove Non-Native Chains."
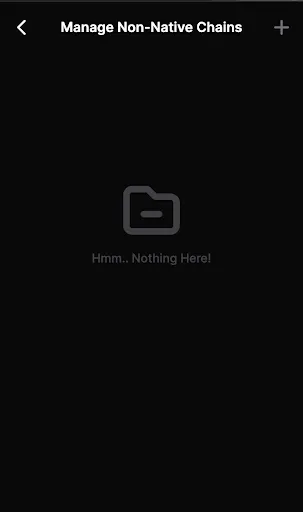
Step 3: Add Network
Click the "plus" icon on the upper right-hand side.
Note: Once the Realio Network has been added to your Keplr wallet, the network appears here under Manage Non-Native Chains.
Step 4: Find the Realio Network
A list of Networks should appear on your screen.
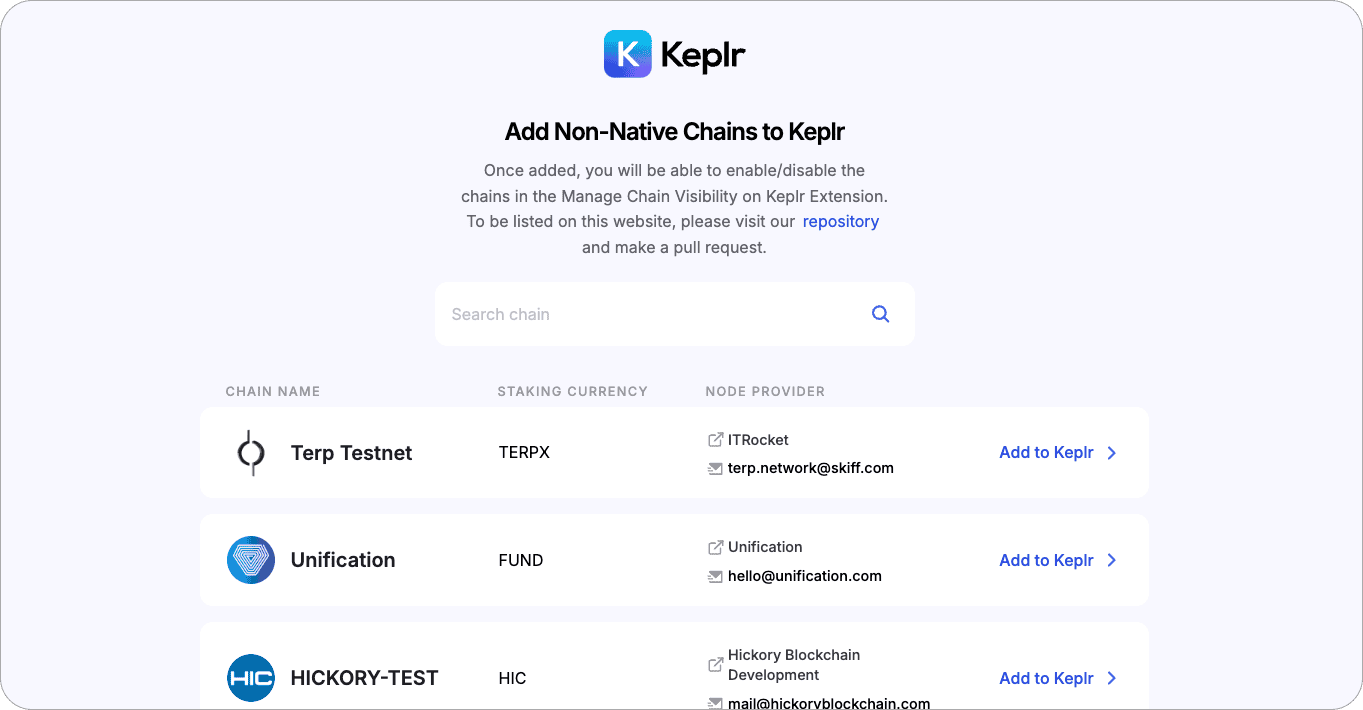
Search for Realio Network by typing "realio" on the search bar, and click to add Realio Network on Keplr.

Step 5: Approve Connection
Review the information about the Realio Network, and approve the Network by hitting the “Approve” button on the bottom of your screen.
You should now be connected to the Realio Network. You can verify this by going back through Step 3 above. The Realio Network should now appear here under Manage Non-Native Chains.
Step 1: Go to Realio Network
Go to the Realio Network official website.
Step 2: Add Network to Wallet
Open the Network connector by hitting the "Connect" button on the upper right-hand side of your screen and “Connect wallet” on the dropdown menu.
Step 3: Select MetaMask
Select the MetaMask icon on the modal left side, and the MetaMask interface will open.
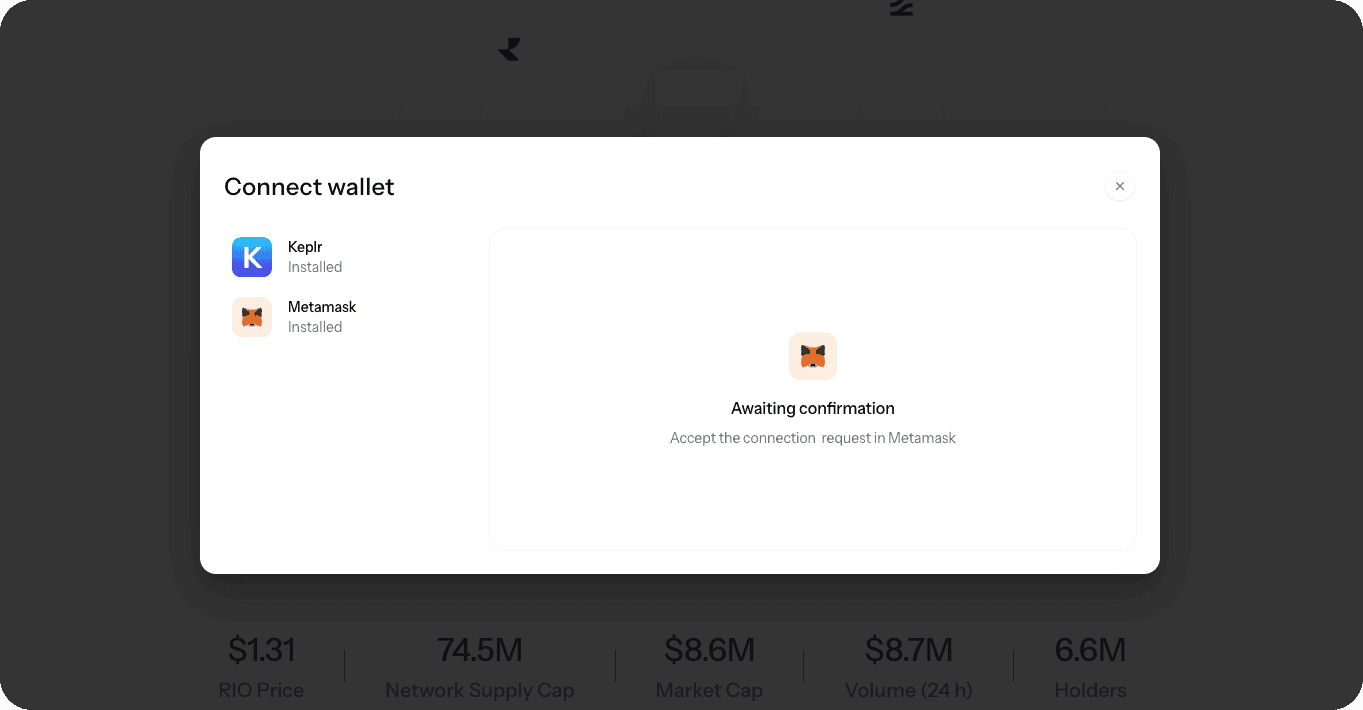
Step 4: Enter Credentials
Enter your MetaMask credentials to log in and complete the process to add the Realio Network to your account.
Step 5: Review & Approve
Review the information about the Realio Network, and approve the Network by hitting the "Approve" button on the lower right-hand side of your screen.

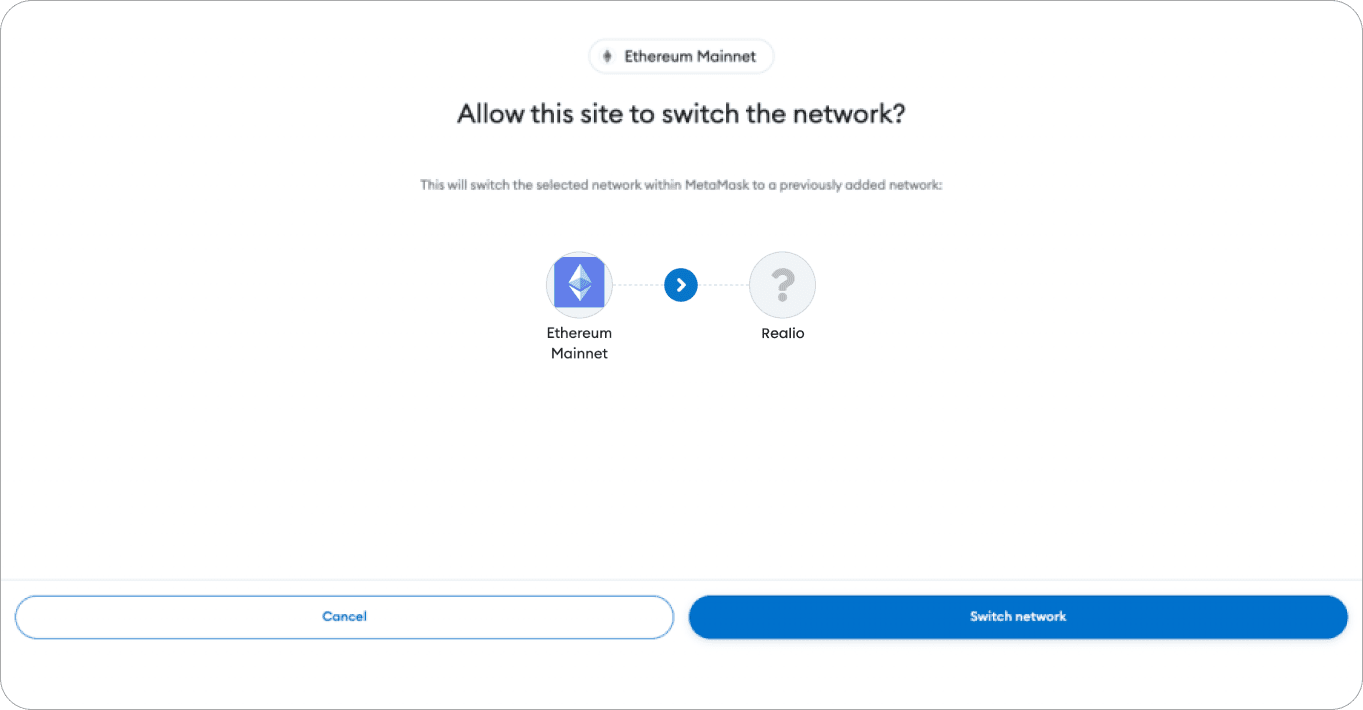
Step 6: Switch to the Realio Network chain
MetaMask will prompt you to switch from whatever chain you are currently on to the Realio Network. You can change Networks by hitting the “Switch Network” button on the lower right-hand side of your screen.
You should now be connected to the Realio Network.
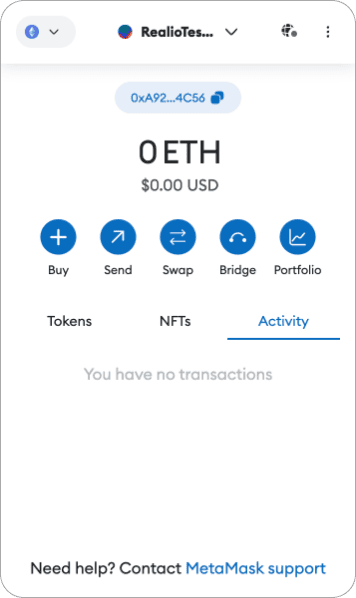
Step 1: Open MetaMask Browser Extension or Mobile App
Open the MetaMask browser extension by hitting the MetaMask icon on the upper right-hand side of your screen or open the mobile app.
Step 2: Add Network
After logging into your MetaMask account, you have two options to add the Realio Network manually to your MetaMask wallet:
You can also add the Realio Network to Keplr by selecting it from a list of available networks.
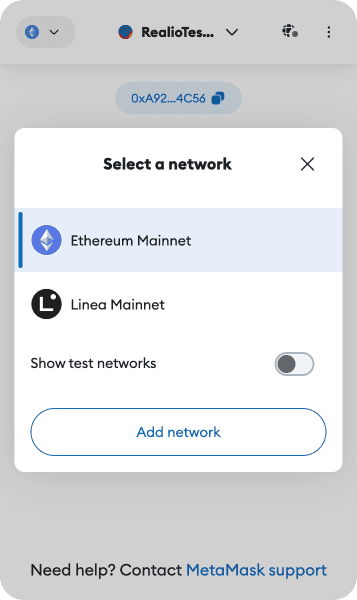
Step 2a: Network Selection Menu
Visit the network selection menu on the upper left-hand side of your screen (where the Ethereum logo is on the screenshot below).
If it's your first time switching networks, you'll see you're on the Ethereum Mainnet.
You can add Realio Network by clicking "Add network.” If you do not have the network selection menu on the upper left-hand side of your screen, click on the settings menu (3 vertical dots) on the upper right-hand side of your screen.
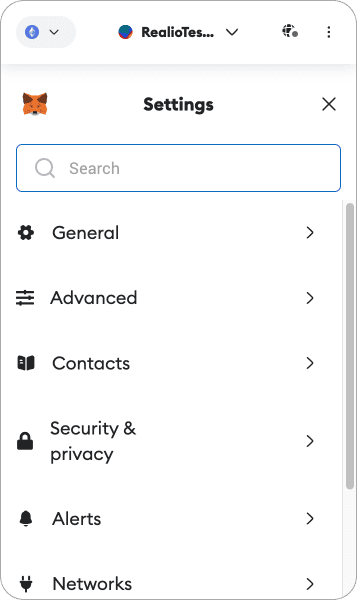
Step 2b: Settings Menu
If you do not have the network selection menu on the upper left-hand side of your screen, click on the settings menu (3 vertical dots) on the upper right-hand side of your screen.
From the drop-down menu, click "Settings."
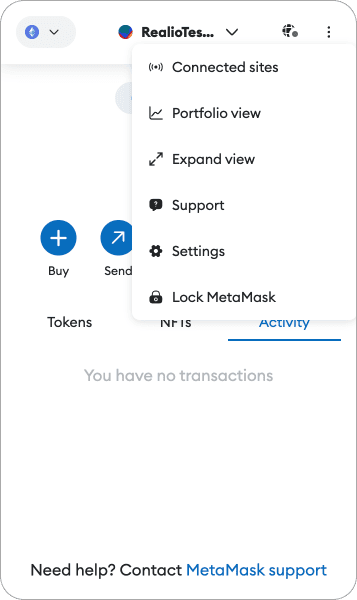
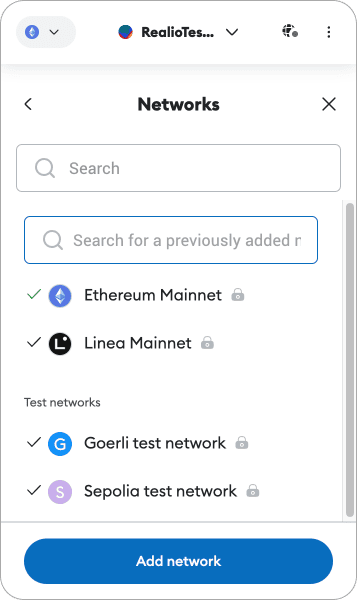
From the drop-down menu, click "Networks."
Click on "Add Networks" from the drop-down.
Step 3: Settings Menu
Select from the popular networks listed or use the search functionality to type in “Realio Network.”
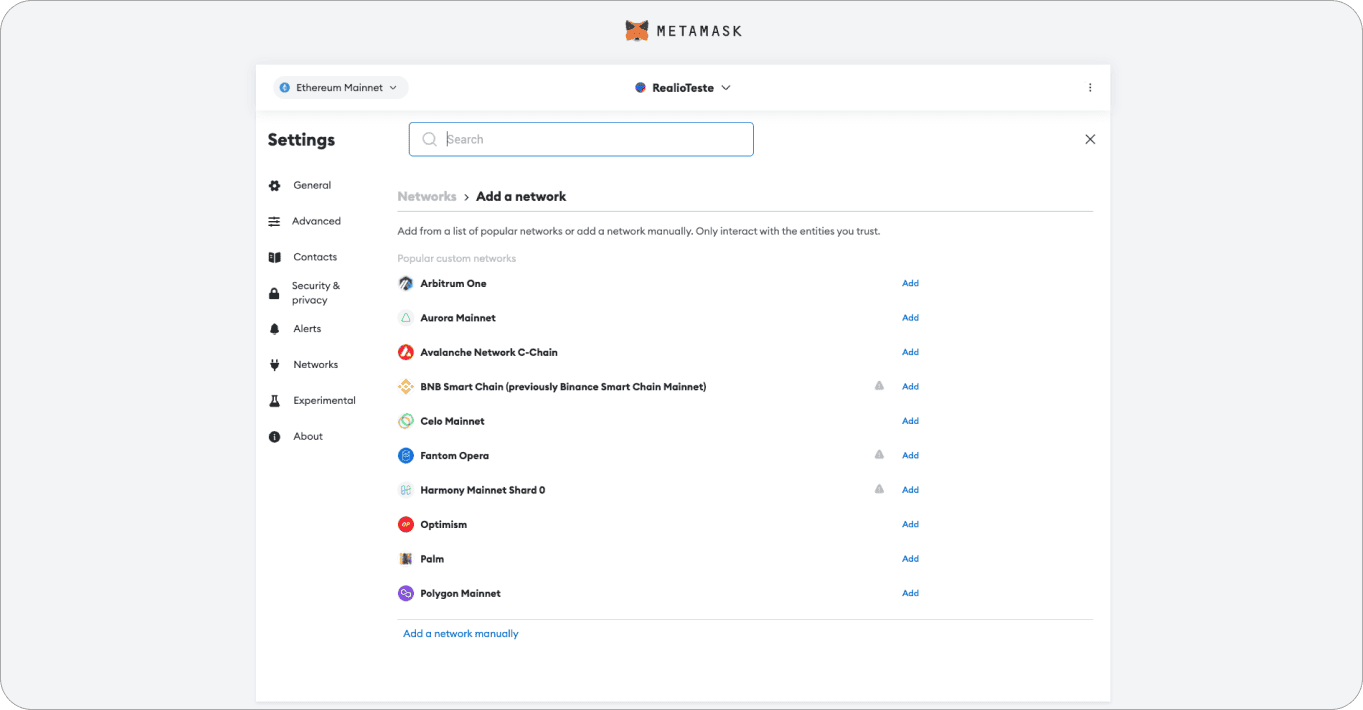
If the network does not populate, you can click the button on the lower left-hand side labeled “
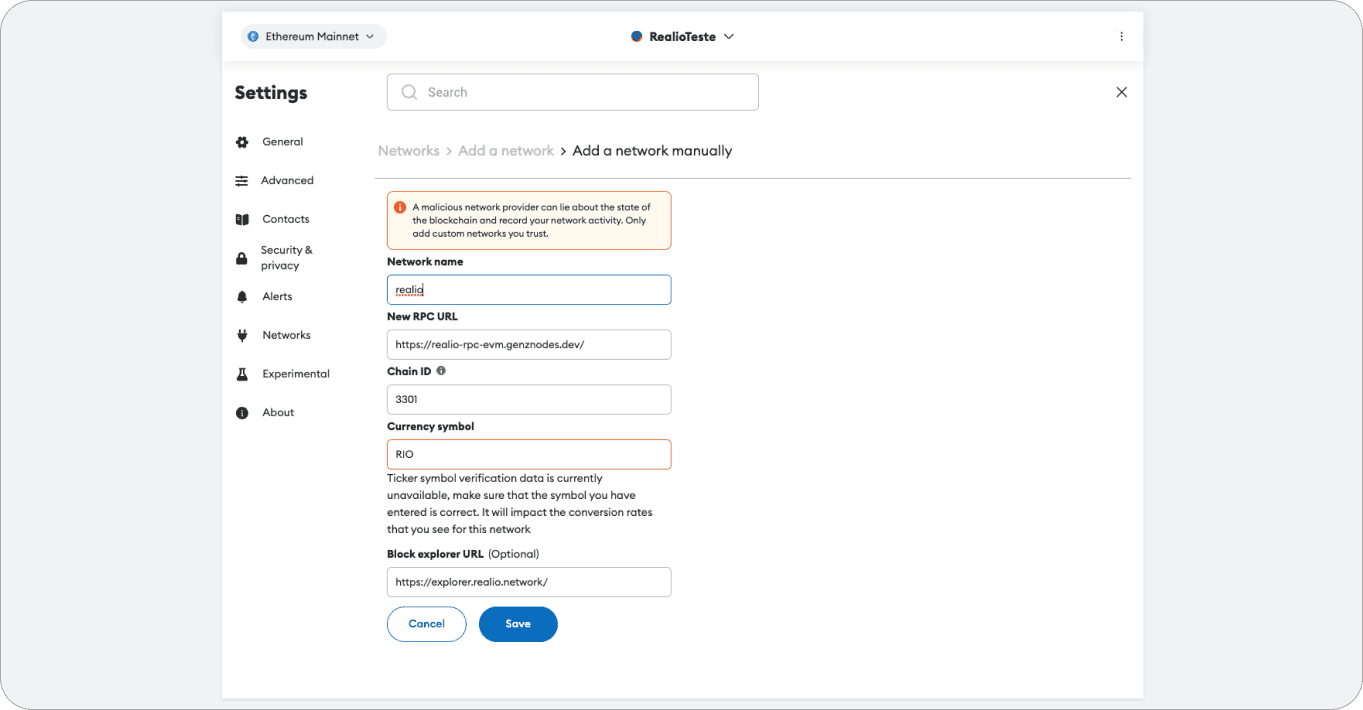
Enter the REALIO NETWORK address below into their relevant fields:
Network Name – realio
New RPC URL – https://json-rpc.realio.network/
Chain ID – 3301
Currency Symbol – RIO
Block Explorer URL (Optional) – https://explorer.realio.network/
To eliminate typing errors, copy and paste the above details into their respective fields.
Step 4: Save the Network
After filling in the fields, click the “Save” button at the bottom of your screen.
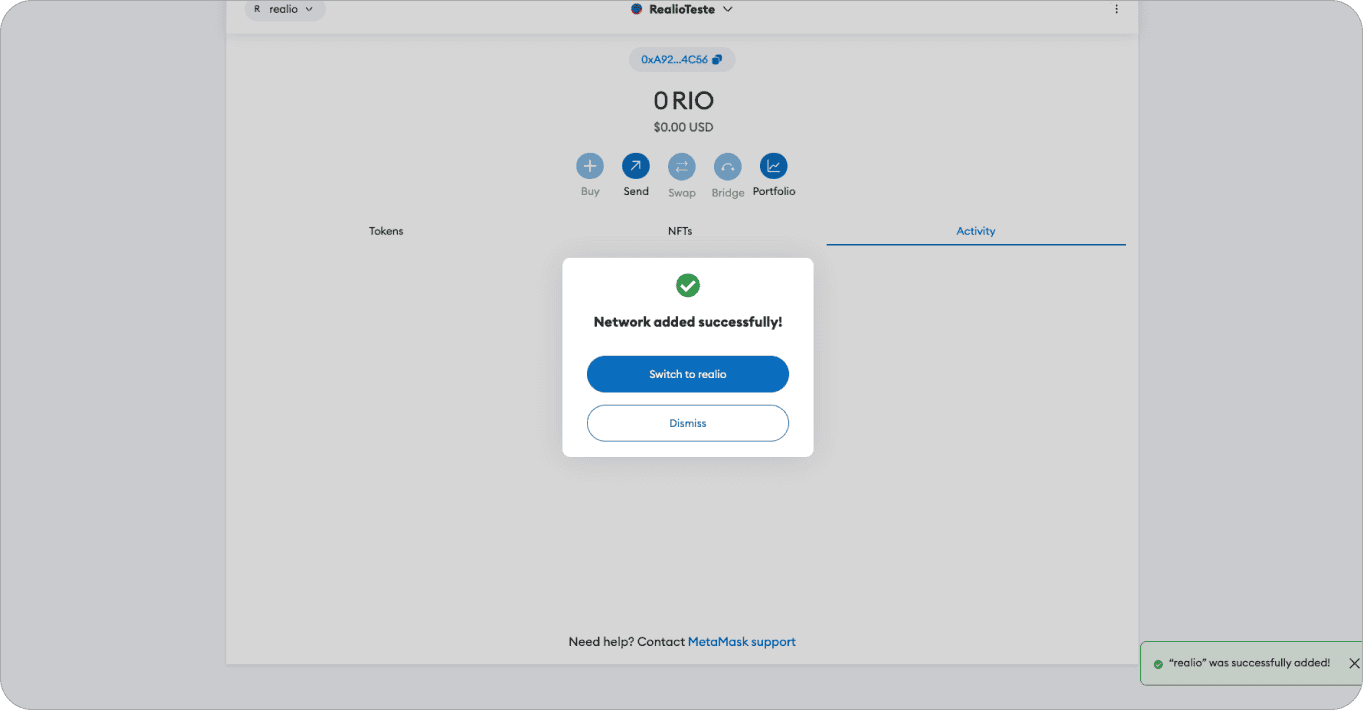
You should now be enabled to add the Realio Network to your MetaMask wallet. To switch over to the network, click the “Switch to Realio” button.
Reminder: You can switch back to Ethereum by clicking the network menu, but you will want to buy RIO on the Realio Network if you want to use it for staking, validating, etc. on the Realio Network.
The Future State of the Realio Network Connection
Currently, the Realio team is in the process of creating a dashboard application for the Realio Network. This app will enable users to make transactions within the application using the Keplr and MetaMask clients.
Additionally, these connections will be crucial in facilitating transactions for upcoming dApps developed by the Realio team and the community.
Connect your MetaMask or Keplr wallet to the Realio Network today and experience the future of decentralized finance firsthand.

Read More

We use cookies!
By continuing to use this site, you consent to our use of cookies. To learn more, please read our Cookie Policy.
Close
Accept
Other Realio Websites
31 Hudson Yards, Floor 11, New York, NY 10001: All rights reserved to Realio Technology LTD 2026 ©

Important Disclosure Regarding RIO and RST:
We want to emphasize that RIO is not an investment in Realio or any other entity. It is a native cryptocurrency and utility token designed for an open-source network. Its value, if any, is purely speculative. Realio does not promote or sell RIO, and any speculation or transactions involving RIO are done entirely at your own risk. Nothing stated by Realio or its team members should be interpreted as an effort to influence the price of RIO or any other utility token. This includes but is not limited to our efforts in developing and maintaining the associated source code. Cryptocurrencies are subject to extreme price volatility, and participants are strongly encouraged to conduct thorough research and understand the risks associated with cryptocurrency markets before engaging in them. For those interested in investing in Realio, we have tokenized the company equity under a Reg D/S offering, using the token ticker RST. More information about RST is available on our platform at app.realio.fund. Whitelisting for RST is open to non-U.S. investors and accredited U.S. investors.


